 ZigBeeForDomoticZ plugin Wiki
The Web interface - Admin section
Please refer to STEP 3 Plugin Configuration to get access to the Web interface administration.
The Admin page has five tabs:
- Provisionning — pair devices
- Group — scan the groups
- Coordinator — restart the coordinator, change the Zigbee channel
- Plugin — upgrade and restart the plugin
- Firmware — update the firmware of your devices
Plugin 9.1.009 and later. This page describes the Admin page available since plugin 9.1.009. In older versions, Admin is a drop-down menu that opens one page per entry.
Admin in the menu bar opens the Plugin tab.
The status bar
Above the tabs, a row of cards shows the state of the installation. It is read when the page opens.
- Plugin: the version and branch of a release. When the plugin runs from a git branch, the branch name and the commit.
- Radio: the coordinator model, with the radio maker and the zigpy library used (for example Texas Instruments · zigpy-znp), or ZiGate.
- Firmware: the coordinator firmware.
- Channel: the Zigbee channel, with its frequency.
- Pairing: Closed, or Open with the time left (No time limit when pairing is open permanently). Click it to go to the Provisionning tab.
Some cards only appear when needed:
- Firmware transfer, while a device firmware update runs: the device and the progress. Click it to go to the Firmware tab.
- Group, while a group scan sends its requests. Click it to go to the Group tab.
- Restart needed, when a saved setting waits for a plugin restart. Click it to go to the Plugin tab.
Pairing
The Provisionning tab (Admin > Provisionning) is used to pair your devices with the coordinator and Domoticz, and to act on a device already paired.
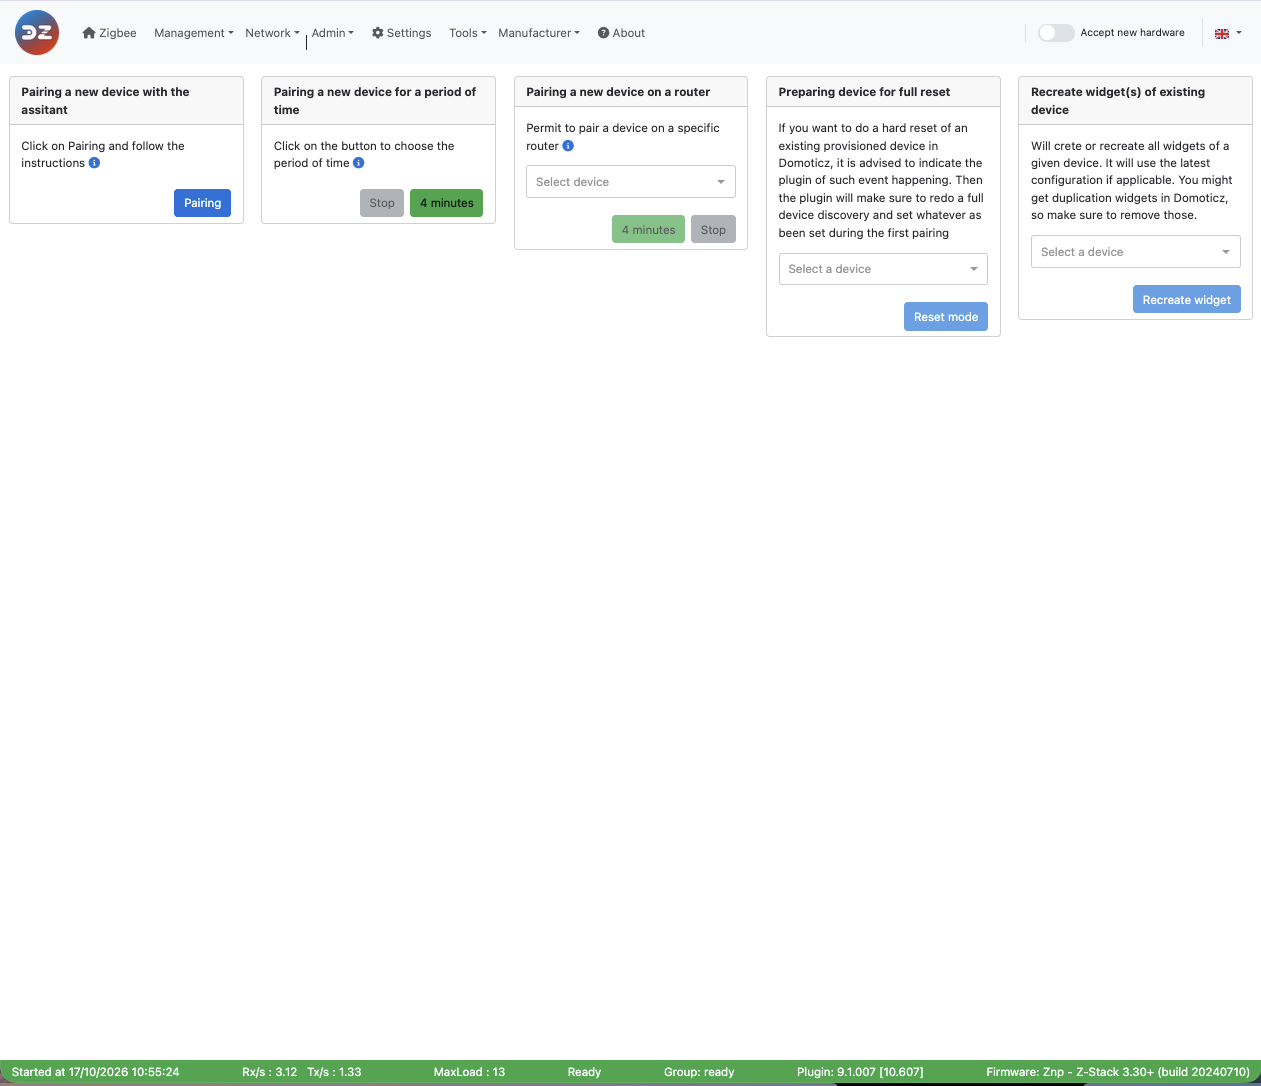 This picture may have changed since this documentation was written.
Pair a new device: choose where the device may join, then click Open for 4 minutes and reset the device as its manual says.
- Anywhere on the network: all the routers, and the coordinator, accept the device.
- Through one router: only the router you choose in the list accepts the device, for example a device far from the coordinator. Open for 4 minutes stays greyed out until a router is chosen.
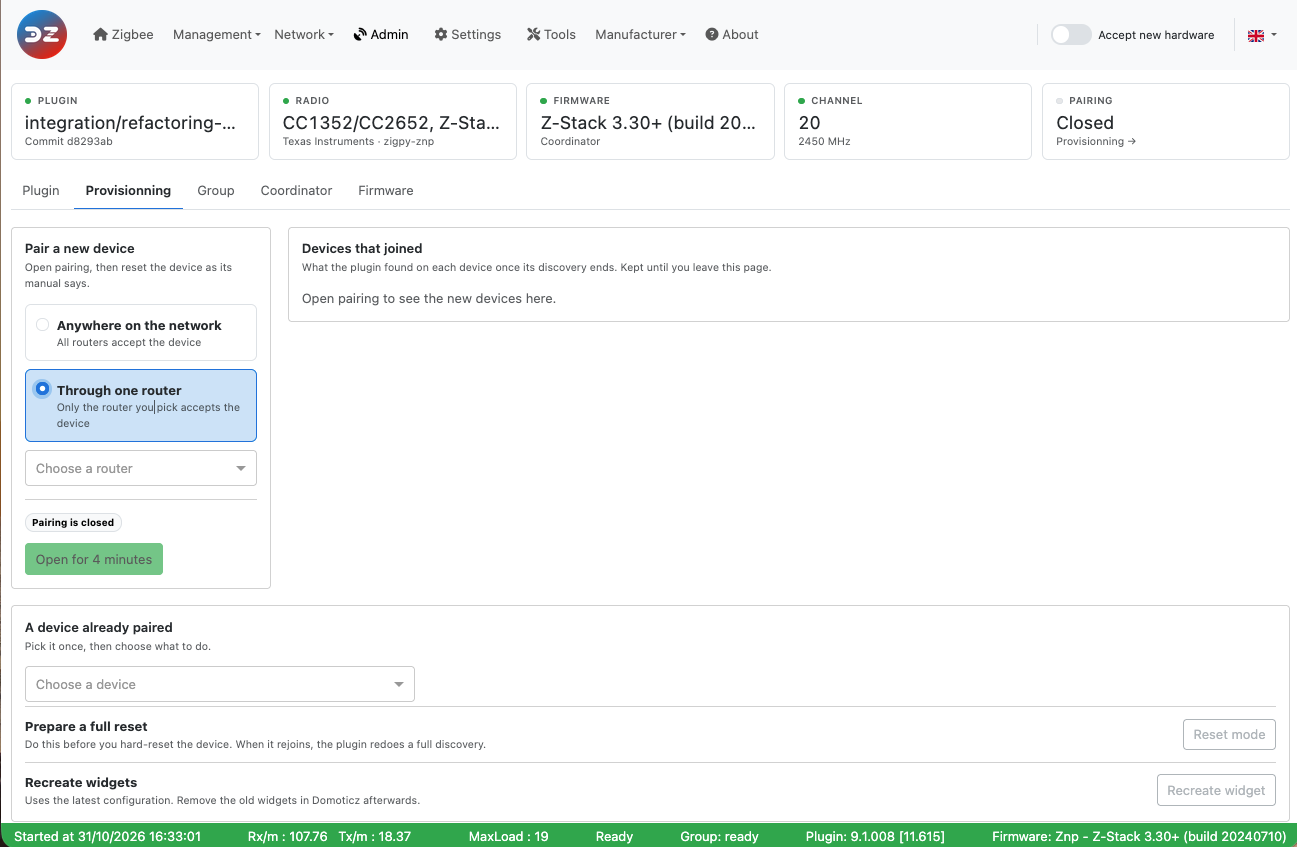
While pairing is open, the card shows Accepting new devices, the time left and a progress bar. 4 minutes again restarts the 4 minutes, and Stop closes pairing. Leaving the page doesn’t close pairing. The Accept new hardware switch of the menu bar also opens pairing everywhere for 4 minutes.
Devices that joined lists each new device while it joins:
- Discovering: the device has joined and the plugin is reading what it can do;
- Paired: the discovery has ended. The card shows the model, the IEEE, whether the plugin has a certified configuration for it, its device type, its endpoints with their clusters, and the Domoticz widgets created;
- Failed or Unexpected: check the plugin log, then prepare a full reset (below) and pair the device again.
The list is kept until you leave the page, and emptied when you open pairing Anywhere on the network. A device that the plugin already knew (paired again) doesn’t appear: check the Domoticz log to see that it has rejoined.
A device already paired: choose the device (search by name, NwkId or model), then:
- Prepare a full reset (Reset mode): do this before you factory-reset a device that is already paired. The plugin forgets what it learnt about the device (bindings, reporting configuration, neighbours…) and, when the device rejoins, redoes a full discovery and configuration as for a first pairing.
- Recreate widgets (Recreate widget): creates the Domoticz widgets of the device again, using the latest device configuration. You may end up with duplicate widgets in Domoticz: delete the ones you don’t need.
Refer to the tutorial Add a new device for more information.
Group
The Group tab (Admin > Group) asks the routers which Zigbee groups they belong to, so that the plugin knows which device is in which group. The result also shows in Management > Groups.
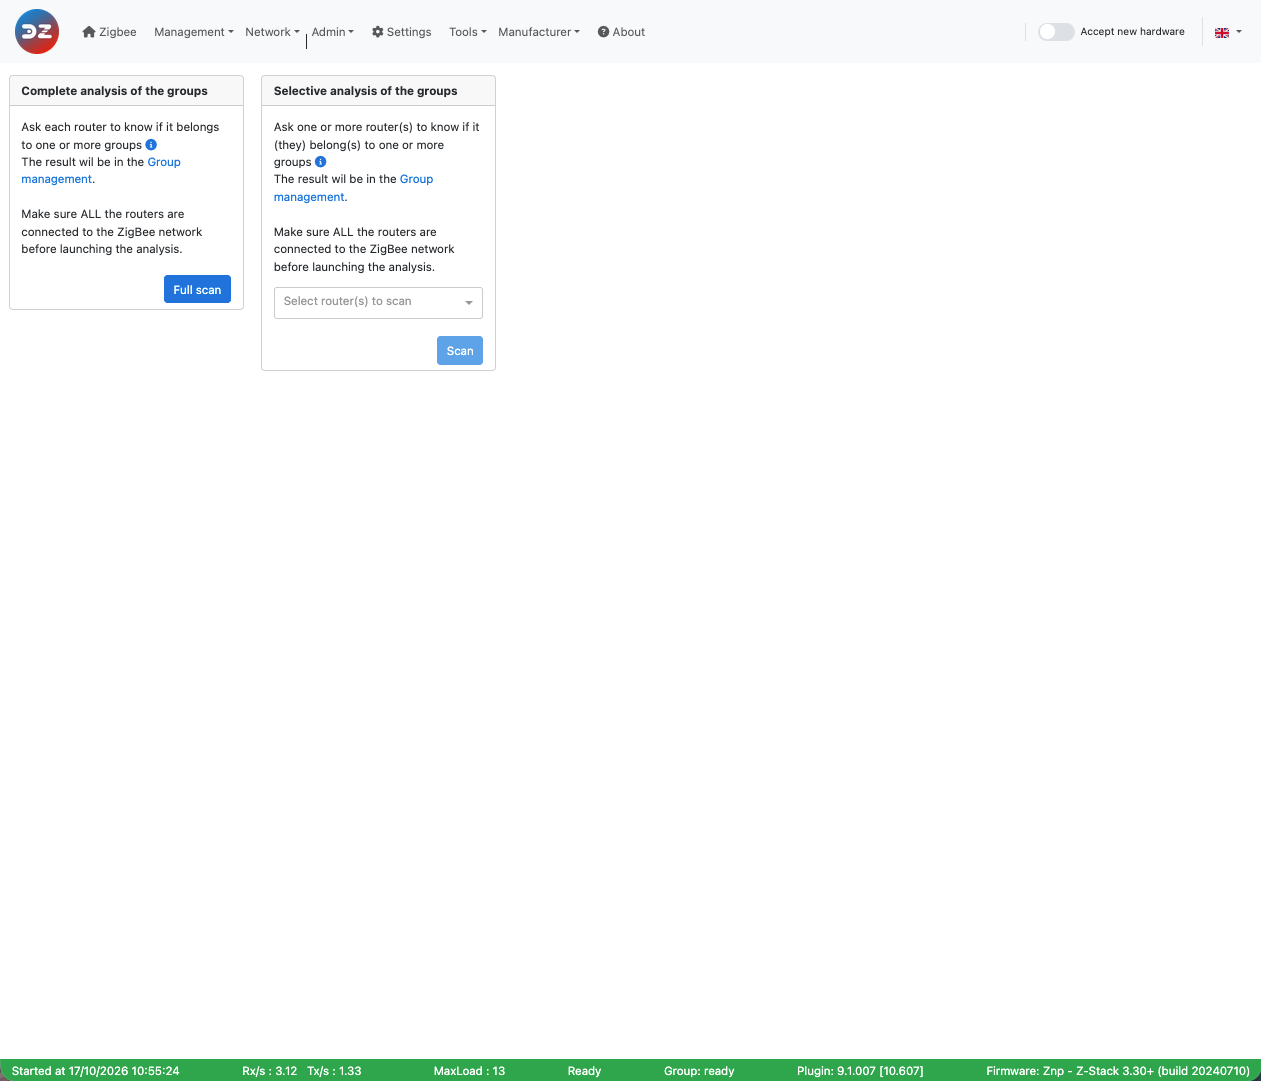 This picture may have changed since this documentation was written.
The table lists the main-powered devices that can be in a group: name and model, short address (NwkId), widgets with their endpoint, the groups the device is a member of, and when it was last asked from this page. Search by name, model or NwkId, and filter with All, In no group or Selected.
- Scan all asks every device of the list.
- Tick one or more devices (or the box of the header, for all the devices shown) and click Scan N selected to ask only those.
The plugin sends the requests (Sending the requests… is shown meanwhile), and the devices answer over the next minutes: click Refresh to update the Member of column.
The groups created via the plugin are seen in Domoticz as a single switch widget, whatever the number of devices in the group. An action on that switch is sent to all the devices of the group.
Groups must be enabled first with the enablegroupmanagement setting (see Group management settings): until then, the tab only shows Group management is off and a link to the settings. Groups themselves are created and edited in Management > Groups (see Group Management).
Refer to the tutorial Group Management for more information.
Coordinator
The Coordinator tab (Admin > Coordinator) shows what the coordinator is and lets you change the Zigbee channel.
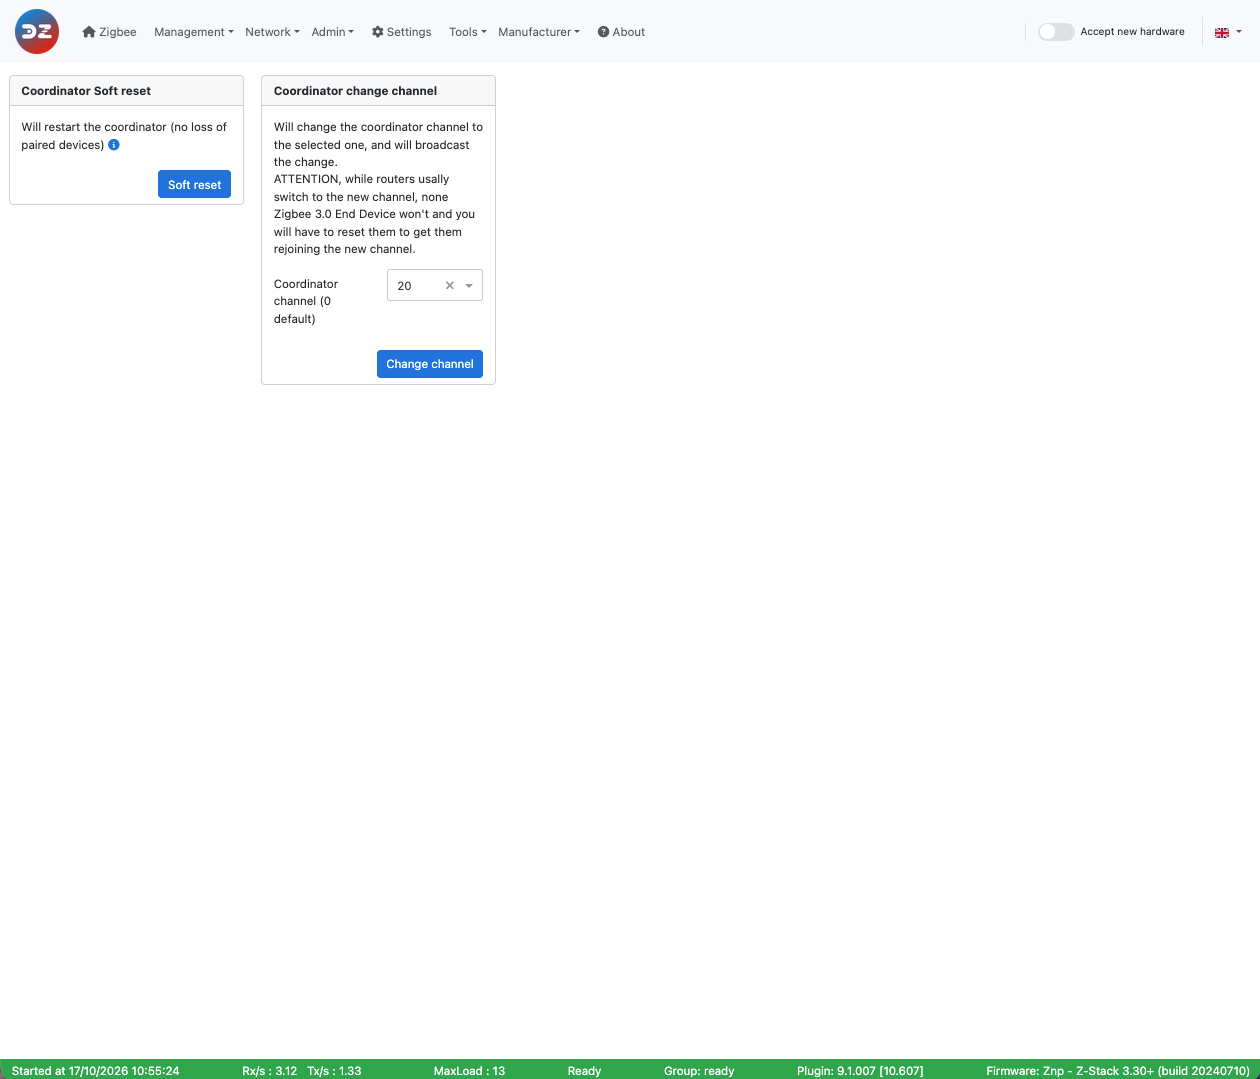 This picture may have changed since this documentation was written.
Coordinator: the radio, its firmware, its IEEE address, its short address (NwkId, always 0000), the channel, the PAN ID and the extended PAN ID.
Change channel: the bars show, for each channel from 11 to 26, the energy the routers measured at the last energy scan (the average of the routers, from 0 to 255). Lower is quieter. The current channel is in black. Without a scan yet, run one from Network > Interference level (see WebUI Network). Channels 15, 20, 25 and 26 overlap least with the Wi-Fi channels 1, 6 and 11.
Click a channel number to select it, then Move to channel N and confirm. The coordinator moves to the new channel and broadcasts the change to the network. Routers follow; end devices that are not Zigbee 3.0 do not, and then need to be paired again on the new channel. See Change the Zigbee channel.
Soft reset (ZiGate only): restarts the ZiGate. Paired devices are kept. It is not offered with zigpy coordinators.
Plugin
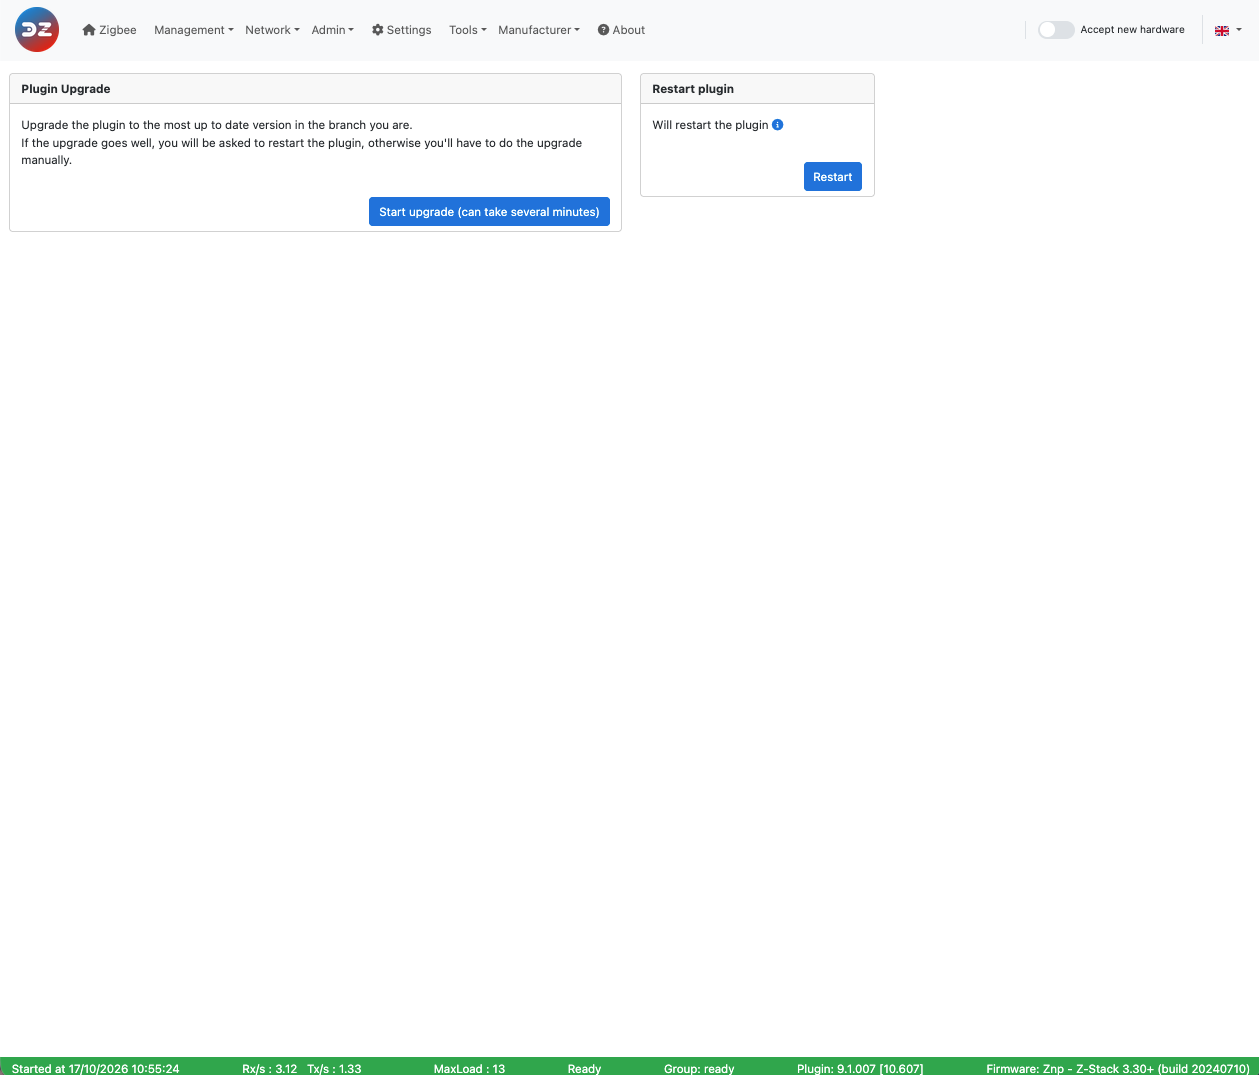
The Plugin tab (Admin > Plugin) upgrades and restarts the plugin.
 This picture may have changed since this documentation was written.
Upgrade the plugin shows the installed version (for a release), the branch, the commit and the version of the certified devices database. The upgrade has two steps, and nothing changes until you restart:
- Upgrade: click Upgrade. The plugin pulls the latest version of the branch you are on and installs the Python modules it needs (it runs the plugin’s
Tools/plugin-auto-upgrade.sh script, and can take several minutes: keep the page open). The output of the script is displayed. If it fails, read the output and upgrade manually as described in Plugin update.
- Restart the plugin: when the upgrade is done, click Restart now to load the new version. Upgrade again runs the upgrade once more.
Restart: Restart… restarts the plugin, after a confirmation. Devices stay paired, and the WebUI reconnects when the plugin is back. Use it after a setting that needs a restart, when the Restart needed card or the blinking indicator of the menu bar says so.
Firmware
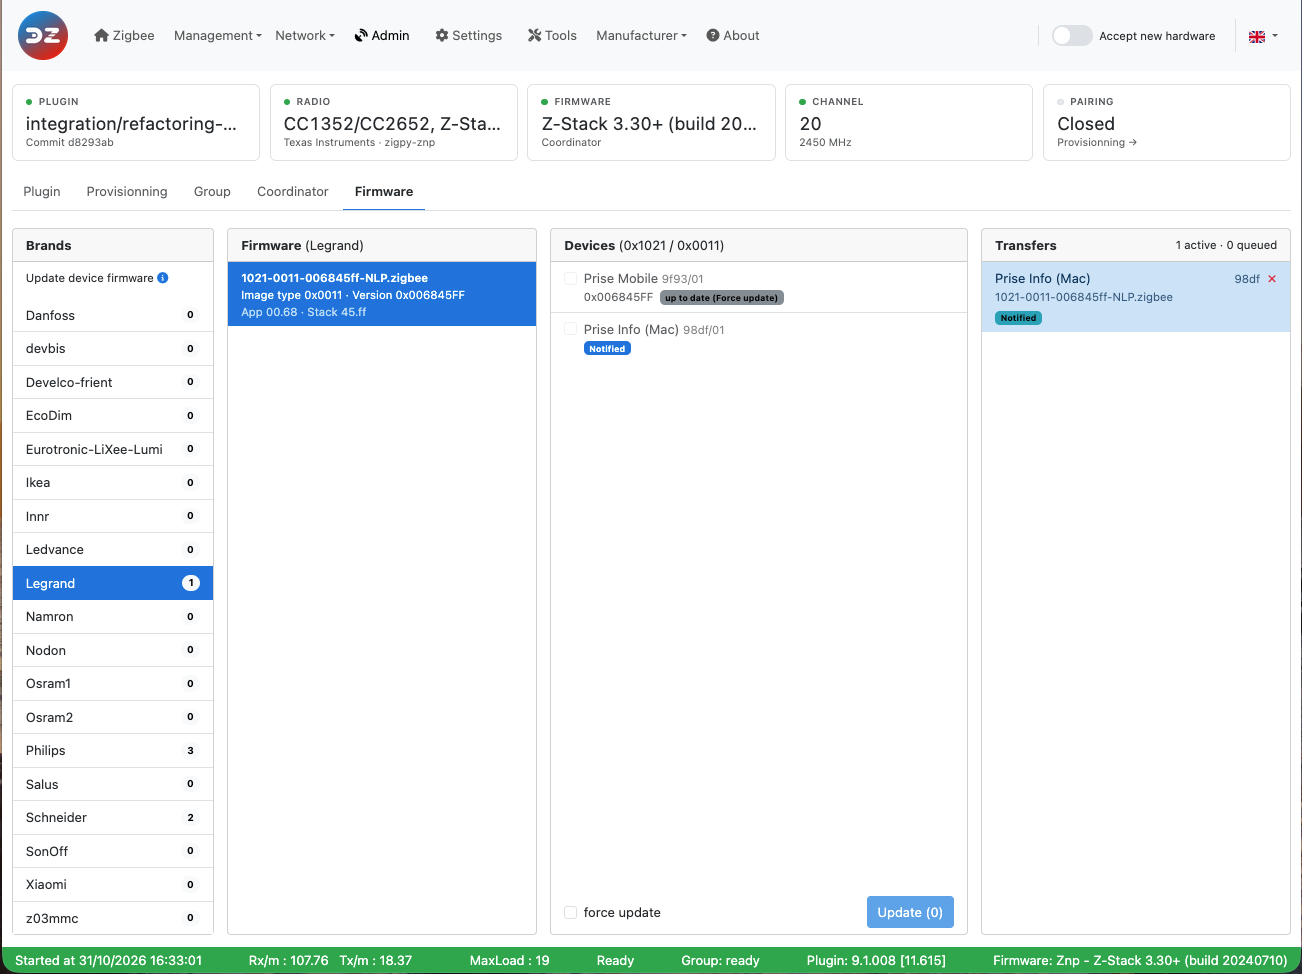
The Firmware page (Admin > Firmware) updates the firmware of your paired devices over the air (OTA). From plugin version 9.1.009 it has four columns, from left to right:
- Brands: the manufacturers, with the number of firmware files loaded for each.
- Firmware: the files of the selected brand, with their image type and version.
- Devices: the devices of that manufacturer, each compared with the selected firmware (update available, up to date, version unknown, already in progress). Tick the device(s) to update. Tick force update to send the image even if the device is not on an older version (to re-flash it, or go back to an earlier version). Click Update and confirm.
- Transfers: every update queued or in progress, with its progress, speed and time left, and the last ones that ended. The red ✕ cancels an update.
 This picture may have changed since this documentation was written.
A firmware file copied into the plugin’s OTAFirmware/ folders shows up when you open or reload this page, without restarting the plugin. With earlier plugin versions, the page has three drop-down lists (manufacturer, firmware file, device(s)) and a new file needs a plugin restart.
Refer to Update device firmware for where to put the firmware files and how the update runs.
Look at the other pages of the plugin Web interface.
The Web interface - Admin section
Please refer to STEP 3 Plugin Configuration to get access to the Web interface administration.
The Admin page has five tabs:
- Provisionning — pair devices
- Group — scan the groups
- Coordinator — restart the coordinator, change the Zigbee channel
- Plugin — upgrade and restart the plugin
- Firmware — update the firmware of your devices
Plugin 9.1.009 and later. This page describes the Admin page available since plugin 9.1.009. In older versions, Admin is a drop-down menu that opens one page per entry.
Admin in the menu bar opens the Plugin tab.
The status bar
Above the tabs, a row of cards shows the state of the installation. It is read when the page opens.
- Plugin: the version and branch of a release. When the plugin runs from a git branch, the branch name and the commit.
- Radio: the coordinator model, with the radio maker and the zigpy library used (for example Texas Instruments · zigpy-znp), or ZiGate.
- Firmware: the coordinator firmware.
- Channel: the Zigbee channel, with its frequency.
- Pairing: Closed, or Open with the time left (No time limit when pairing is open permanently). Click it to go to the Provisionning tab.
Some cards only appear when needed:
- Firmware transfer, while a device firmware update runs: the device and the progress. Click it to go to the Firmware tab.
- Group, while a group scan sends its requests. Click it to go to the Group tab.
- Restart needed, when a saved setting waits for a plugin restart. Click it to go to the Plugin tab.
Pairing
The Provisionning tab (Admin > Provisionning) is used to pair your devices with the coordinator and Domoticz, and to act on a device already paired.
This picture may have changed since this documentation was written.
Pair a new device: choose where the device may join, then click Open for 4 minutes and reset the device as its manual says.
- Anywhere on the network: all the routers, and the coordinator, accept the device.
- Through one router: only the router you choose in the list accepts the device, for example a device far from the coordinator. Open for 4 minutes stays greyed out until a router is chosen.
While pairing is open, the card shows Accepting new devices, the time left and a progress bar. 4 minutes again restarts the 4 minutes, and Stop closes pairing. Leaving the page doesn’t close pairing. The Accept new hardware switch of the menu bar also opens pairing everywhere for 4 minutes.
Devices that joined lists each new device while it joins:
- Discovering: the device has joined and the plugin is reading what it can do;
- Paired: the discovery has ended. The card shows the model, the IEEE, whether the plugin has a certified configuration for it, its device type, its endpoints with their clusters, and the Domoticz widgets created;
- Failed or Unexpected: check the plugin log, then prepare a full reset (below) and pair the device again.
The list is kept until you leave the page, and emptied when you open pairing Anywhere on the network. A device that the plugin already knew (paired again) doesn’t appear: check the Domoticz log to see that it has rejoined.
A device already paired: choose the device (search by name, NwkId or model), then:
- Prepare a full reset (Reset mode): do this before you factory-reset a device that is already paired. The plugin forgets what it learnt about the device (bindings, reporting configuration, neighbours…) and, when the device rejoins, redoes a full discovery and configuration as for a first pairing.
- Recreate widgets (Recreate widget): creates the Domoticz widgets of the device again, using the latest device configuration. You may end up with duplicate widgets in Domoticz: delete the ones you don’t need.
Refer to the tutorial Add a new device for more information.
Group
The Group tab (Admin > Group) asks the routers which Zigbee groups they belong to, so that the plugin knows which device is in which group. The result also shows in Management > Groups.
This picture may have changed since this documentation was written.
The table lists the main-powered devices that can be in a group: name and model, short address (NwkId), widgets with their endpoint, the groups the device is a member of, and when it was last asked from this page. Search by name, model or NwkId, and filter with All, In no group or Selected.
- Scan all asks every device of the list.
- Tick one or more devices (or the box of the header, for all the devices shown) and click Scan N selected to ask only those.
The plugin sends the requests (Sending the requests… is shown meanwhile), and the devices answer over the next minutes: click Refresh to update the Member of column.
The groups created via the plugin are seen in Domoticz as a single switch widget, whatever the number of devices in the group. An action on that switch is sent to all the devices of the group.
Groups must be enabled first with the enablegroupmanagement setting (see Group management settings): until then, the tab only shows Group management is off and a link to the settings. Groups themselves are created and edited in Management > Groups (see Group Management).
Refer to the tutorial Group Management for more information.
Coordinator
The Coordinator tab (Admin > Coordinator) shows what the coordinator is and lets you change the Zigbee channel.
This picture may have changed since this documentation was written.
Coordinator: the radio, its firmware, its IEEE address, its short address (NwkId, always 0000), the channel, the PAN ID and the extended PAN ID.
Change channel: the bars show, for each channel from 11 to 26, the energy the routers measured at the last energy scan (the average of the routers, from 0 to 255). Lower is quieter. The current channel is in black. Without a scan yet, run one from Network > Interference level (see WebUI Network). Channels 15, 20, 25 and 26 overlap least with the Wi-Fi channels 1, 6 and 11.
Click a channel number to select it, then Move to channel N and confirm. The coordinator moves to the new channel and broadcasts the change to the network. Routers follow; end devices that are not Zigbee 3.0 do not, and then need to be paired again on the new channel. See Change the Zigbee channel.
Soft reset (ZiGate only): restarts the ZiGate. Paired devices are kept. It is not offered with zigpy coordinators.
Plugin
The Plugin tab (Admin > Plugin) upgrades and restarts the plugin.
This picture may have changed since this documentation was written.
Upgrade the plugin shows the installed version (for a release), the branch, the commit and the version of the certified devices database. The upgrade has two steps, and nothing changes until you restart:
- Upgrade: click Upgrade. The plugin pulls the latest version of the branch you are on and installs the Python modules it needs (it runs the plugin’s
Tools/plugin-auto-upgrade.shscript, and can take several minutes: keep the page open). The output of the script is displayed. If it fails, read the output and upgrade manually as described in Plugin update. - Restart the plugin: when the upgrade is done, click Restart now to load the new version. Upgrade again runs the upgrade once more.
Restart: Restart… restarts the plugin, after a confirmation. Devices stay paired, and the WebUI reconnects when the plugin is back. Use it after a setting that needs a restart, when the Restart needed card or the blinking indicator of the menu bar says so.
Firmware
The Firmware page (Admin > Firmware) updates the firmware of your paired devices over the air (OTA). From plugin version 9.1.009 it has four columns, from left to right:
- Brands: the manufacturers, with the number of firmware files loaded for each.
- Firmware: the files of the selected brand, with their image type and version.
- Devices: the devices of that manufacturer, each compared with the selected firmware (update available, up to date, version unknown, already in progress). Tick the device(s) to update. Tick force update to send the image even if the device is not on an older version (to re-flash it, or go back to an earlier version). Click Update and confirm.
- Transfers: every update queued or in progress, with its progress, speed and time left, and the last ones that ended. The red ✕ cancels an update.
This picture may have changed since this documentation was written.
A firmware file copied into the plugin’s OTAFirmware/ folders shows up when you open or reload this page, without restarting the plugin. With earlier plugin versions, the page has three drop-down lists (manufacturer, firmware file, device(s)) and a new file needs a plugin restart.
Refer to Update device firmware for where to put the firmware files and how the update runs.
Look at the other pages of the plugin Web interface.