 ZigBeeForDomoticZ plugin Wiki
Plugin settings
This is the second step of the ZigBeeForDomoticZ Plugin installation process.
You should have finished the Step 1 Plugin installation
Seetings
-
Open DomoticZ in your navigator.
-
Go to then Configuration menu then Hardware
-
To add the ZigBeeForDomoticZ Plugin, fill the following informations :
Parameter
Description
Information
Name
Fill a Coordinator’s Name
This is the name you want to set for the instance of the plugin. In case you run several coordinators, you’ll have several instance of this Plugin Hardware and so the name will help you to distinguish each of them.
It is advisable not to put any space or special character in the name of the Plugin. This name can be used in a URL and a space or special characters can generate problems.
Type
Select ZigBeeForDomoticZ plugin
If ZigBeeForDomoticZ plugin does not appear at the bottom of the list, it is because the plugin is not properly installed.
Coordinator Model
Select the Coordinator’s model
- ZiGate (V1)
- ZiGate+ (V2)
- Texas Instruments ZNP
- Silicon Labs EZSP
- ConBee/RasBee
Coordinator Type
Select the Coordinator’s type
- USB
- DIN
- PI
- TCPIP (wifi or Ethernet)
- Aucun
Port série
Select the USB port to which the coordinator is plugged
Remember to fix the port of your usb equipment Persistent USB
IP
Fill in the coordinator’s IP address
For TCPIP mode only
Leave 0.0.0.0 for other modes
Port
Fill the Coordinator’s Port (9999 by default)
For TCPIP mode only
Leave 9999 for other modes
API base url
Fill the address of the DomoticZ server
Address form http://username:password@127.0.0.1:port
By default : http://127.0.0.1:8080
WebUI Port
Fill in the port to access the web administration of the Plugin (9440 by default).
To be modified when using several instances of the Plugin..
Initialize Coordinator
Select True to initialize the coordinator with the plugin settings (False by default).
Must be activated during initial configuration (ou after an Erase EEPROM of a ZiGate).
ATTENTION : Activation will erase all pairing information from the coordinator.
Restart the Plugin to start initialization. Verify that the setting is in a False state after reboot.
Debugging
Leave empty
-
If it is for a first installation of the Plugin with a new coordinator, set Initialize Coordinator to True, otherwise always leave to False (this parameter erases the coordinator’s information).
-
Click on Add.
The line corresponding to your ZigBeeForDomoticZ plugin (with the name defined) normally appeared in the hardware list.
- Click on the line of your ZigBeeForDomoticZ plugin.
ATTENTION : From now on, you should not click on the Add button at the bottom: this would have the effect of duplicating the plugin. Always go up to the top of the settings to use the Modify.
-
Set Initialize ZCoordinator (Erase Memory) to False.
-
Unchecked Activate to disable the plugin.
-
Click on Modify (do not click Add as this will duplicate the plugin).
-
Reclick on the plugin ZigBeeForDomoticZ line.
-
Recheck Activate to reactivate the Plugin.
-
Click on Modifier to relaunch the Plugin.
Check the logs that the ZigBeeForDomoticZ plugin initializes correctly.

This page may have have changed since this documentation was written.
The Plugin’s Widgets
Status Widget
The plugin is providing 2 widgets for administration purposes. Those Widgets are created by the plugin itself at startup phase if DomoticZ setting Accept new hardware devices is activated,

In domoticz you will find a Widget name ‘Zigbee Status xx’ (in the Measurement dashboard) where ‘xx is the HardwareID of the plugin
This status widget will give you information on the current state of the plugin. You can even see in the Log of the widget what have been the different states in the past
-
Off (Red)
The plugin set the status to Off when it is going Off, or there is a communication problem identified
-
Startup (grey)
The plugin set the status to Startup, when starting up
-
Ready (green)
This is a normal state, where the plug-in is ready to handle messages and commands
-
Enrolment (amber)
The plugin switch to this mode, when an object is currently in pairing/enrolment process.
-
Busy (amber)
The plugin switch to this mode, when the number of commands to Coordinator is exceeding a certain threshold. In that state, you can experiment delays.
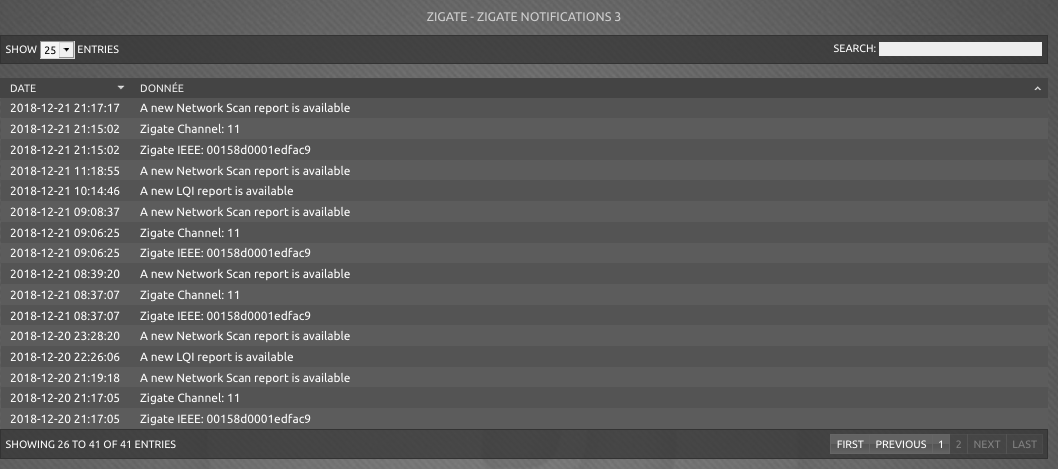
Text Widget
Here is a non-exhaustive list of notifications:
- Enrolment Success
- Enrolment not successful
- Leave notification from an object
- Network Topology (LQI) report available
- Network Scan (Interferences) report available
- Network down
- Zigbee Channel
Here is an example of the Notifications Widget Logs
Plugin settings
This is the second step of the ZigBeeForDomoticZ Plugin installation process.
You should have finished the Step 1 Plugin installation
Seetings
-
Open DomoticZ in your navigator.
-
Go to then Configuration menu then Hardware
-
To add the ZigBeeForDomoticZ Plugin, fill the following informations :
| Parameter | Description | Information |
|---|---|---|
| Name | Fill a Coordinator’s Name | This is the name you want to set for the instance of the plugin. In case you run several coordinators, you’ll have several instance of this Plugin Hardware and so the name will help you to distinguish each of them. It is advisable not to put any space or special character in the name of the Plugin. This name can be used in a URL and a space or special characters can generate problems. |
| Type | Select ZigBeeForDomoticZ plugin |
If ZigBeeForDomoticZ plugin does not appear at the bottom of the list, it is because the plugin is not properly installed. |
| Coordinator Model | Select the Coordinator’s model | - ZiGate (V1) - ZiGate+ (V2) - Texas Instruments ZNP - Silicon Labs EZSP - ConBee/RasBee |
| Coordinator Type | Select the Coordinator’s type | - USB - DIN - PI - TCPIP (wifi or Ethernet) - Aucun |
| Port série | Select the USB port to which the coordinator is plugged | Remember to fix the port of your usb equipment Persistent USB |
| IP | Fill in the coordinator’s IP address | For TCPIP mode only Leave 0.0.0.0 for other modes |
| Port | Fill the Coordinator’s Port (9999 by default) | For TCPIP mode only Leave 9999 for other modes |
| API base url | Fill the address of the DomoticZ server | Address form http://username:password@127.0.0.1:port By default : http://127.0.0.1:8080 |
| WebUI Port | Fill in the port to access the web administration of the Plugin (9440 by default). | To be modified when using several instances of the Plugin.. |
| Initialize Coordinator | Select True to initialize the coordinator with the plugin settings (False by default). Must be activated during initial configuration (ou after an Erase EEPROM of a ZiGate). |
ATTENTION : Activation will erase all pairing information from the coordinator. Restart the Plugin to start initialization. Verify that the setting is in a False state after reboot. |
| Debugging | Leave empty |
-
If it is for a first installation of the Plugin with a new coordinator, set Initialize Coordinator to True, otherwise always leave to False (this parameter erases the coordinator’s information).
-
Click on Add.
The line corresponding to your ZigBeeForDomoticZ plugin (with the name defined) normally appeared in the hardware list.
- Click on the line of your ZigBeeForDomoticZ plugin.
ATTENTION : From now on, you should not click on the Add button at the bottom: this would have the effect of duplicating the plugin. Always go up to the top of the settings to use the Modify.
-
Set Initialize ZCoordinator (Erase Memory) to False.
-
Unchecked Activate to disable the plugin.
-
Click on Modify (do not click Add as this will duplicate the plugin).
-
Reclick on the plugin ZigBeeForDomoticZ line.
-
Recheck Activate to reactivate the Plugin.
-
Click on Modifier to relaunch the Plugin.
Check the logs that the ZigBeeForDomoticZ plugin initializes correctly.
This page may have have changed since this documentation was written.
The Plugin’s Widgets
Status Widget
The plugin is providing 2 widgets for administration purposes. Those Widgets are created by the plugin itself at startup phase if DomoticZ setting Accept new hardware devices is activated,
In domoticz you will find a Widget name ‘Zigbee Status xx’ (in the Measurement dashboard) where ‘xx is the HardwareID of the plugin This status widget will give you information on the current state of the plugin. You can even see in the Log of the widget what have been the different states in the past
-
Off (Red) The plugin set the status to Off when it is going Off, or there is a communication problem identified
-
Startup (grey) The plugin set the status to Startup, when starting up
-
Ready (green) This is a normal state, where the plug-in is ready to handle messages and commands
-
Enrolment (amber) The plugin switch to this mode, when an object is currently in pairing/enrolment process.
-
Busy (amber) The plugin switch to this mode, when the number of commands to Coordinator is exceeding a certain threshold. In that state, you can experiment delays.
Text Widget
Here is a non-exhaustive list of notifications:
- Enrolment Success
- Enrolment not successful
- Leave notification from an object
- Network Topology (LQI) report available
- Network Scan (Interferences) report available
- Network down
- Zigbee Channel
Here is an example of the Notifications Widget Logs